📬 Postman Collection and Workflows
In previous sections, we laid out how to get started, defined your environments, and wrote a complete OpenAPI Spec Blueprint. Now, we shift from writing and planning to interacting. Enter Postman
, your UI-friendly gateway for testing real API behavior.Before diving into the visual workflows and automation tools, it's important to understand that Postman is not just a tool, it's a bridge between your API's documentation and its actual functionality. While OpenAPI serves as your blueprint, Postman lets you simulate exactly how those endpoints behave across development environments; ensuring confidence and clarity in every call.
🗂️ What Are Postman Collections?
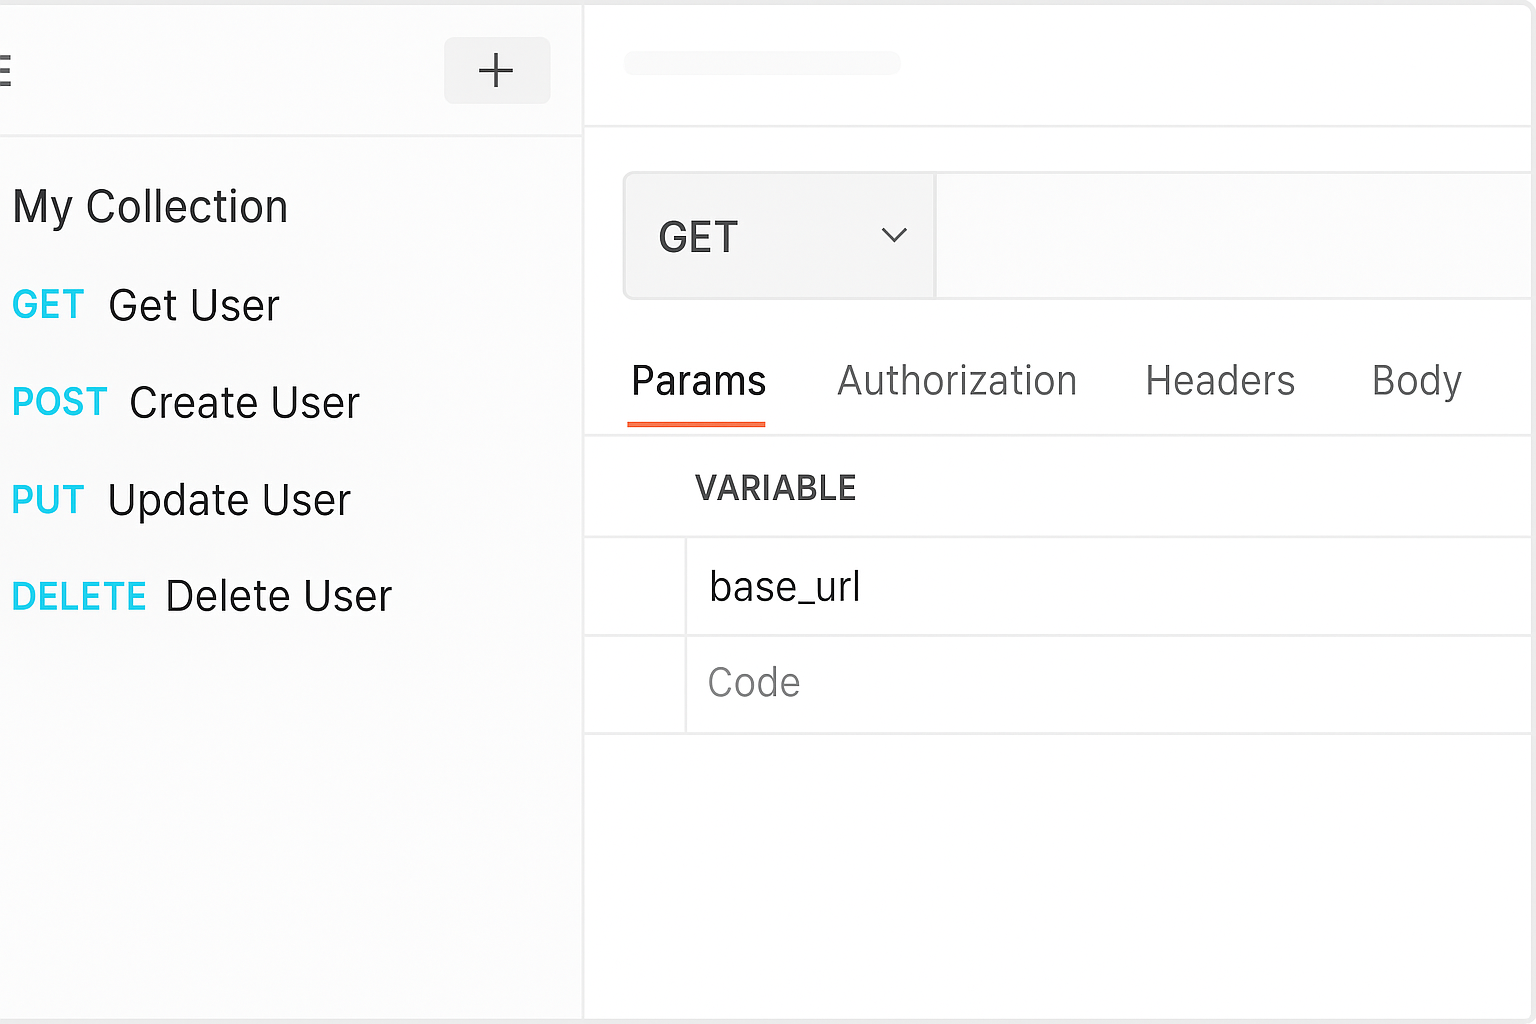
A Postman Collection
is a powerful tool to group related API calls. Each request can be configured with headers, authorization, query parameters, and example bodies. It closely mirrors thepaths you defined earlier in your OpenAPI YAML.
This brings static docs to life; instead of imagining what GET /users should return, Postman lets you test it, see the response body, check status codes, and explore error behavior in real time.
Postman collections are especially useful when teams need to share standardized test flows across development, QA, and staging; no need to reinvent the wheel every sprint. We'll now move from structure to visuals.
🖼️ Visual Gallery: Postman in Action
Let’s walk through three fundamental figures to help you understand how collections and environments come together. These images are a direct reflection of the setup you should already have from earlier YAML planning.
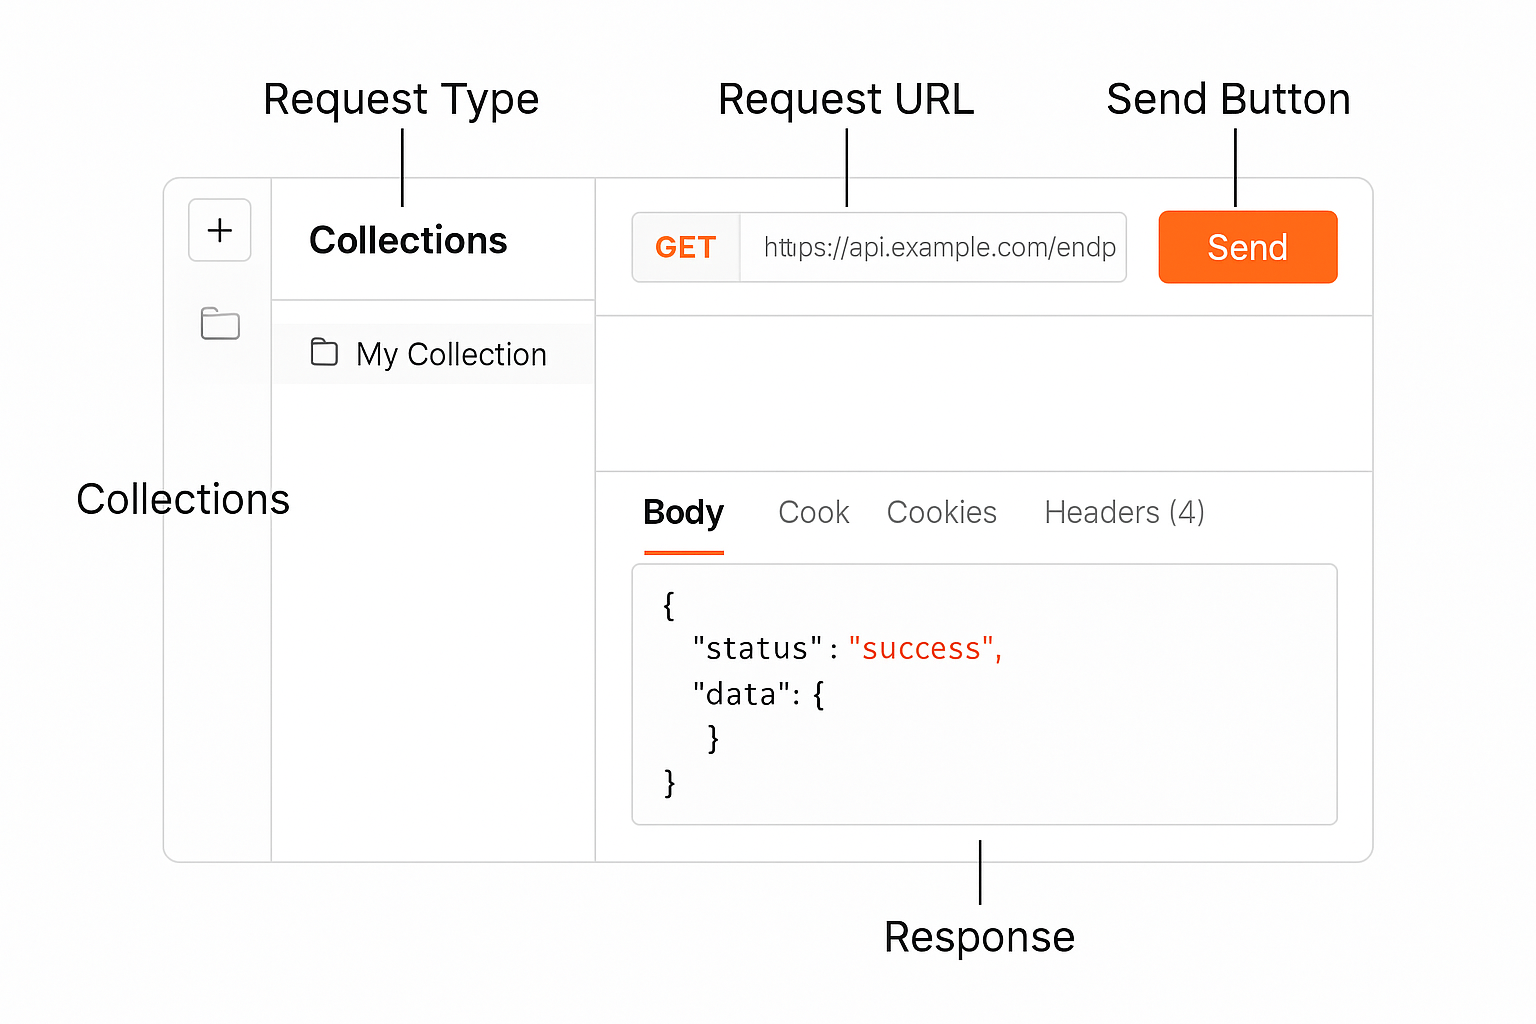
Each image represents a layer of interaction; collections for organization, environments for flexibility, and execution for validation. With these concepts firmly visualized, we're ready to discuss environment linkage more deeply.
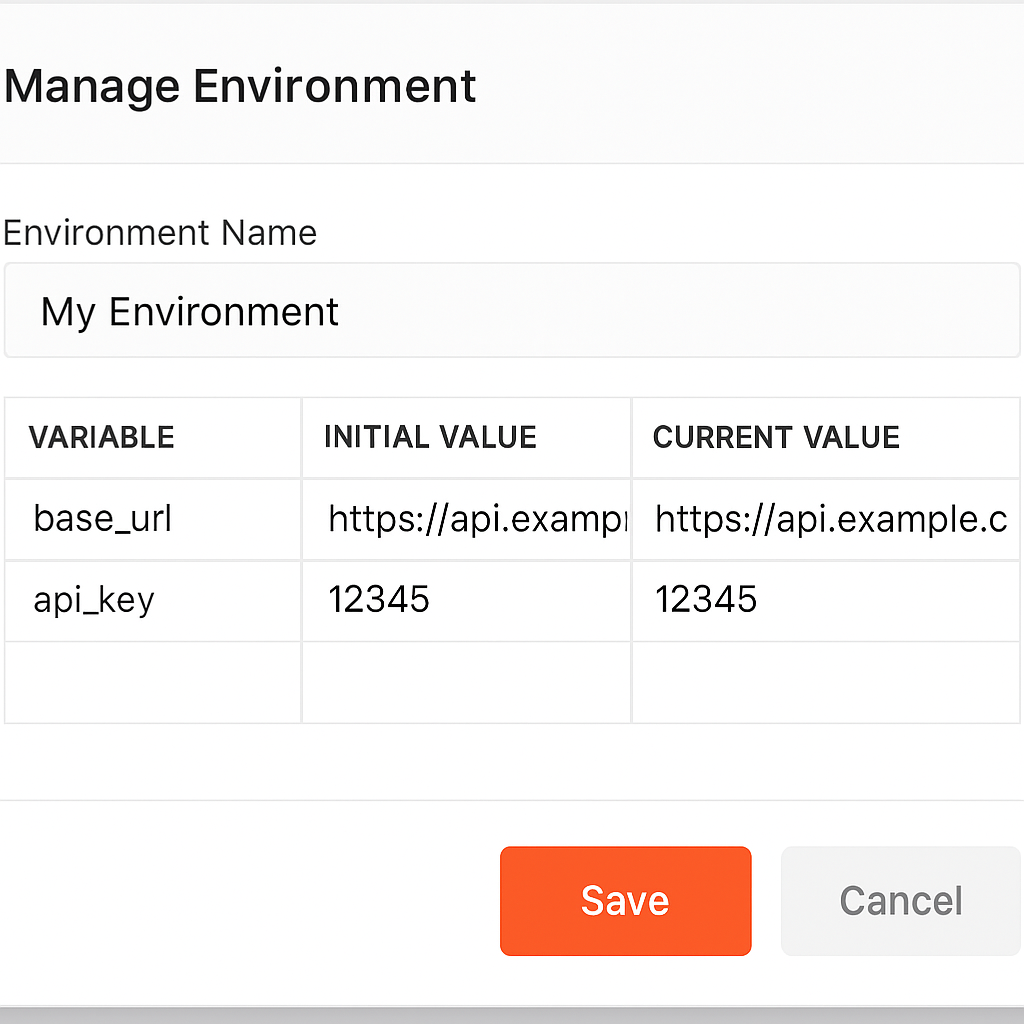
🌐 Postman + Environments = Flexibility
Recall the servers section in your OpenAPI spec? Postman Environments
For example, if you want to test your API against localhost, then staging, and finally production, you can simply switch Postman environments and reuse the same requests; greatly reducing duplication and improving testing consistency.
We’ll now see how those environment values play out when actually executing and debugging your first real-world request.
🧪 Executing Requests and Validating Responses
Postman provides real-time feedback; JSON responses, headers, status codes, response time, and size. You’ll know instantly if your 401 Unauthorized token logic is broken or if a payload fails due to a missing required schema property.
Postman’s inspector tools make debugging a breeze; allowing you to dig deeper into what’s happening behind the scenes. Now let’s automate those flows.
🔁 Workflows, Pre-Request Scripts, and Tests
Postman offers Pre-request Scripts
and Test Scripts.You can chain requests, simulate multi-step workflows (like login, create, get), and even test conditionals. These are crucial for making sure your 401 and 403 logic behaves as intended across endpoints; something we emphasized in Authentication.
By writing these scripts early, your teams gain immediate feedback and reusable test automation; setting the stage for true CI testing next.
🔄 Exporting Collections and YAML Bridge
📤 Exporting Collections as YAML
After building your Postman Collection, you can export it as a YAML
file:- Click
...next to the collection → Export - Choose
Collection v2.1 (JSON) - Use a converter (e.g., json2yaml.com) to convert it to YAML
- Embed it into your OpenAPI spec if needed
paths:
  /users:
    get:
      summary: Fetch all users
      responses:
        '200':
          description: A list of users
          content:
            application/json:
              schema:
                type: array
                items:
                  $ref: '#/components/schemas/User'
🎬 Step-by-Step Timeline Walkthrough
🗂️Open Postman Collection
Locate your Postman workspace and open the "Fake-Users-API" collection. This is the folder that holds all your endpoints (GET, POST, PUT, DELETE) mimicking what you previously defined in your OpenAPI YAML paths.
🌍Switch to Development Environment
Click the top-right dropdown in Postman and choose the "Development" environment. This injects variables like {{base_url}} and {{api_key}} into your requests, just like the servers and securitySchemes defined earlier.
📬Send GET /users Request
Expand the GET /users request inside your collection. Click "Send" to dispatch it. Postman will automatically fill in your base URL, attach authorization headers, and return a formatted JSON response for inspection.
🧪Inspect Test Scripts and Pre-Request
Switch to the "Tests" tab of your request. View the JavaScript assertions that check for 200 OK, valid response structure, or header values. If included, pre-request scripts run beforehand to set tokens or dynamic timestamps.
🚀Test POST /users Request
Move to the POST /users request. Enter a sample JSON body and hit "Send". This tests schema compliance, body validation, and response formatting—linked to our OpenAPI component definitions.
🧰Simulate Workflow with Collection Runner
Open Postman’s Collection Runner. Select the "Fake-Users-API" collection, choose the "Development" environment, and execute multiple requests in sequence. This helps simulate full user flows like login → fetch → update.
🖥️Export and Run via Newman CLI
Go to File → Export Collection. Use Newman to run it from your terminal with `newman run Fake-Users-API.postman_collection.json`. This bridges your API tests into CI pipelines—covered in the next Integration section.
🧠 Postman Mastery Quiz
Each of these steps builds on what you’ve already learned. Next, we'll validate the depth of that knowledge through a custom quiz.
What is a Postman Collection used for?
What are Postman Environments useful for?
What does a pre-request script do in Postman?
🛤️ What’s Next: Integration CI Pipelines
You’ve now mastered how Postman brings your specs to life. But what happens when your API changes weekly? You need automation, validation, and feedback loops. In the next section, we’ll walk through CI pipelines; showing how to run these tests automatically on every push, pull request, or deploy.